background

Wednesday, April 27, 2011

Talia's Potholders

Slowly but surely, I'm able to complete a small project here and there. Ashlyn is becoming more and more capable of entertaining herself for short periods of time, so I am able to get a few stitches in here and there. I just wanted to share the latest thing I've been working on.
My best friend, Talia, recently told me she needs new potholders. Knowing that she loves neutral colors, I found a nice combo of cotton yarn in my stash. These are fairly easy to do, and if you can work without interruptions, should only take about 1 1/2 hours per potholder. The PATTERN I used was found on Ravelry.com. I can't tell you how much I love that website! So much info and so many free patterns for both knitting and crocheting.

I hope she likes these and I already know that I will be making myself a set. Now to work on her lace wrap I started over a year ago...

Sunday, April 17, 2011

Do-It-Yourself BabyLegs


I've been meaning to share this tutorial for awhile now, but I've finally gotten around to it. I hope you enjoy it, and the savings of making your own BabyLegs with minimal sewing! I would just like to state that I am not a seamstress and I am mostly self taught when it comes to sewing, so I apologize for any mistakes.
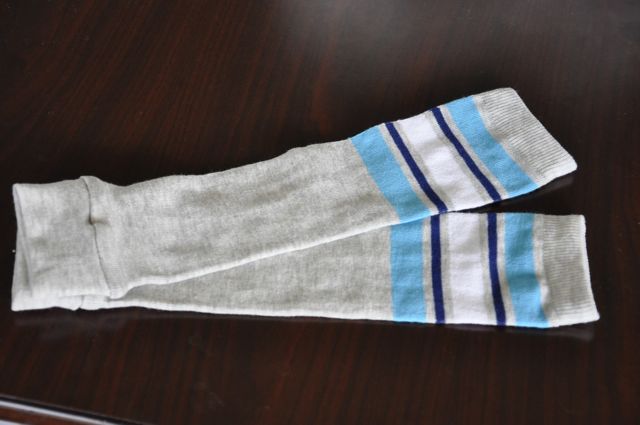
 I make my BabyLegs using women's Xhiliration kneehigh socks from Target. They are just $2 a pair, but these I got on clearance for $1.40. They have a decent selection and they change out the stock often so you can collect many different ones pretty quickly. The selection for pairs that will work for boys is limited but it can be done. I believe Wal-Mart has a good selection as well, just not for as cheap.
 Since I have made a couple dozen of these, I will share a little tidbit that I've discovered useful in keeping them looking good for more than a few washes. The example above shows the inside of a pair of socks that have a lot of ends on the inside.  If possible, try to avoid ones that have these stringy ends because they start to unweave quickly.
 This is the outside of the example of what to avoid. These have only been washed three times. I still like the colors, so I went ahead and made them. Sometimes it's worth it!
 Here is what you want to look for. There are few, if any, ends inside that will end up coming apart.
 Now for the work to begin. You will make straight cuts just above the heel, below the heel, and at the toe.
 I cut both socks together to ensure that they are fairly even.
 Take the short portion that covers the arch of the foot, and fold in into itself. You want the inside of the fabric touching and the rightside out.
 Take that cuff and put it around the bottom of the leg portion of the sock. As you can see, the nature of the fabric causes it to roll. I do not pin the pieces together as I find that it tends to make it harder to sew.
 If your free-arm is skinny enough, you can put the sock around it. As you can see, mine is too large so I have to feed it by hand.
 Sew the cuff to the sock (you will have 3 edges to worry about) but be sure that the fabric doesn't roll, or the edge will show once you turn down the cuff.
 This time I used a 3 step zigzag, but I typically don't like to use this stitch unless I have to. It's good to use if you have to stretch the fabric, but with the BabyLegs, I feel a straight stitch is better. I have yet to pop a stitch.
Turn the cuff down and you have one finished BabyLeg! Do that once again and you'll have a pair. It takes me about 10 minutes to finish a pair from start to finish. Please feel free to leave a comment if I you need help or if my instructions are unlear. Enjoy!!

Tuesday, April 12, 2011

Crocheted Pageboy Hats


My apologies for taking so long to post another project, but things have been crazy! I'd like to share what I've been working on while my daughter and I have been sick. These crocheted hats are fast and fun to make. If I sit down and focus, I can complete a hat in about 2-3 hours. For those of you that do not know how to crochet, I suggest looking at videos on YouTube to see the basics. You can click HERE if you don't want to go through the hassle of searching.
The pattern for this hat is fairly simple. If you want to get into yarn crafts, such as knitting or crocheting, I suggest checking out Ravelry.com. There are tons of free patterns and lots of info to be found there. This pattern is the Cheri Hat Pattern.

For the flower, I cannot remember where I found the pattern, but if I do figure it out, I will credit the source. I will post the written instructions for you. I made 3 rounds of petals for the hats featured in the photos.
     Using a size H hook, chain 4. Join the end to the first chain with a slip stitch to form a ring.

     Round 1: (single crochet in the ring, chain 3) 6 times. Again, join the last stitch to the first single     crochet with a slip stitch.

     Round 2: (single crochet, chain 1, 3 double crochets, chain 1, single crochet) in each space created by the chain 3.

     Round 3: Now you begin working in the back of the flower you have started creating. (single crochet around the first spoke, then chain 4) 6 times. Join last stitch to first stitch with a slip stitch.

     Round 4: (single crochet, chain 1, 5 double crochets, chain 1, single crochet) in each space created by the chain 4.

     Round 5: Repeat round 3, but chain 5 instead of 4. Join last stitch to first with a slip stitch and weave in ends.

     If you want to add another layer of petals, repeat Round 3, increasing the number of stitches in the chain by one, and Round 4, increasing the double crochets by two.

Here is the pattern I used for the Leaves. Feel free to contact me if you have any questions! I'll help to the best of my ability. 
 Edited for an action shot (and to show off my adorable daughter :P)

Friday, March 25, 2011

A Penny Saved..

In today's economy, finding ways to save money is the focus in many households. Small things can make a difference in your budgeting and can add up quickly. A great way to save is to use crocheted washcloths for dishes. These are quick and easy to make, and are reusable with just a quick wash! Much better than throwing out sponges weekly because they begin to stink. This simple pattern is also a quick and easy gift for others looking to save.

Hello, my friends!

For a long time I've considered creating a place to share all the ideas I have and share the things I create. I'm probably a little late to the blog scene, and I apologize for my tardiness.

My plan for this blog is to share my excitement and the information I've collected while learning about knitting, crocheting, paper crafts, and sewing. Projects will span from making hairbows to creating Christmas cards. I hope you'll join me on this journey of sharing and, as always, learning new exciting things! Thanks for stopping by!